Baked vs. BBQ: Master Sticky Glazed Ribs for Ultimate Tenderness
There's a universally acknowledged truth in the culinary world: few things beat the sheer satisfaction of biting into a perfectly cooked rib. We're talking about that magical moment when the meat, infused with sweet, smoky, and often a touch of spicy or boozy flavor, simply melts away from the bone, leaving behind a sticky, caramelized glaze that lingers on your palate. But achieving this ultimate tenderness combined with that irresistible sticky finish often begs the question: is it better to go the route of
baked or barbecued sticky glazed ribs? This isn't just a matter of preference; it's a journey into methods, timing, and flavor that can elevate your rib game to legendary status.
The Quest for Perfect Ribs: Tenderness Meets Sticky Glaze
The pursuit of the perfect rib often involves a culinary deep dive, a dedication to experimentation that sees home cooks (and professional chefs) trying various approaches. Many have started, as I once did, attempting to grill whole racks from start to finish, only to find them dried out before they ever reached true tenderness. Others might try baking whole racks, achieving some tenderness but often missing that deep, clinging flavor. The secret, uncovered through delicious trial and error, lies in understanding that ultimate tenderness usually comes first, through a gentle, moist cooking environment, before the flavor-packed glaze is introduced and caramelized.
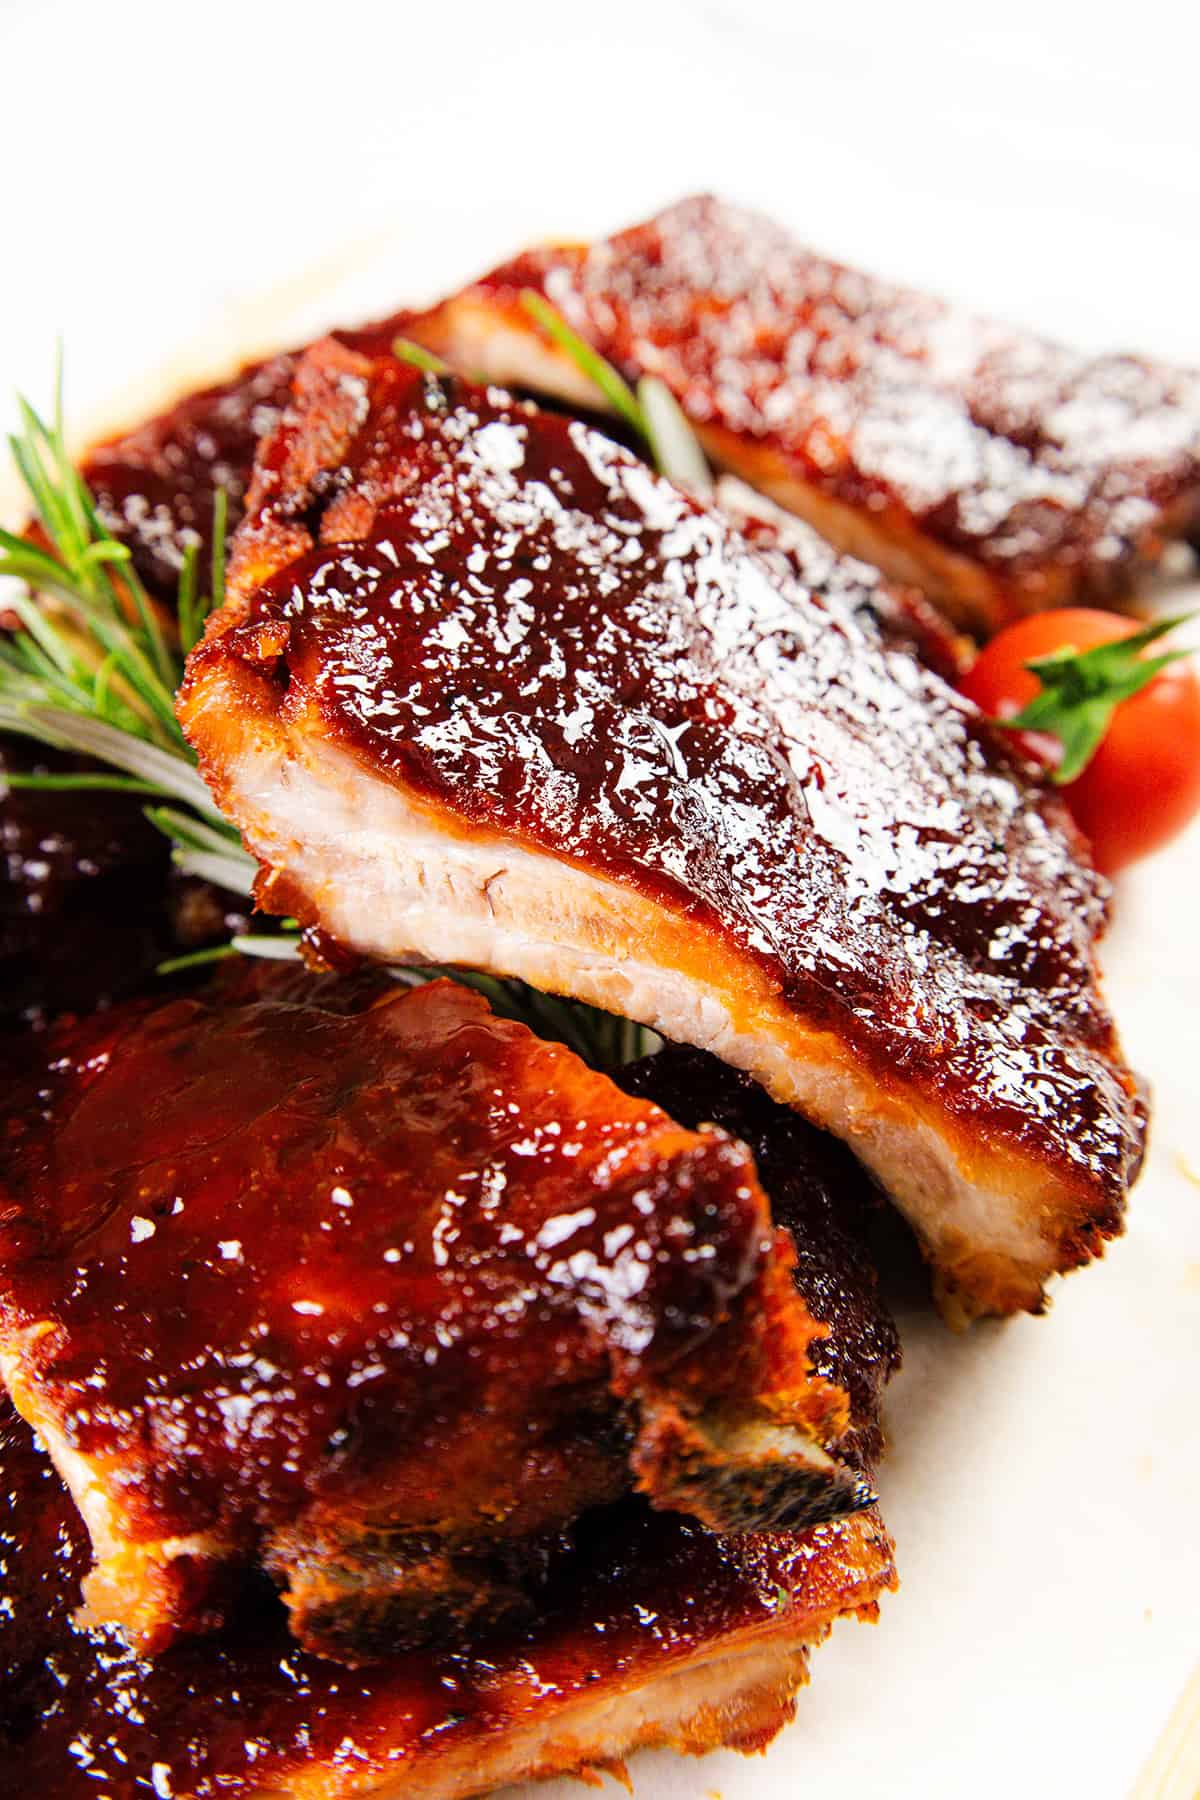
The ideal rib boasts a trifecta of qualities: it's *fall-off-the-bone tender*, permeated with a *bold, complex flavor*, and finished with a *craveable, sticky glaze*. Whether that flavor leans sweet and savory with a bourbon kick, or takes an aromatic, spicy Asian twist, the methodology for achieving the perfect texture remains surprisingly consistent. The beauty of modern rib cooking is its flexibility; you can truly master these elements using either your oven or your outdoor grill, often leveraging a hybrid approach that marries the best of both worlds.
Mastering Tenderness: The "Low and Slow" Secret (Baked Method)
The foundation of any truly exceptional sticky glazed rib is its tenderness. This isn't something that can be rushed; it demands a "low and slow" approach. For many, especially those looking for a consistent, no-fail method, the oven is your best friend in this initial phase.
Preparation is Key to Tenderness
- Choosing Your Ribs: Start with quality. Meaty pork baby back ribs are a popular choice due to their flavor and manageable size, but spareribs also work beautifully. Look for good marbling and a decent layer of meat.
- The Membrane Debate: This is a point of discussion among rib enthusiasts. The thin, whitish membrane on the back of the ribs (the bone side) can be chewy and might prevent the ribs from achieving that true fall-off-the-bone texture. Some argue it helps retain moisture. My preferred approach is a middle ground: score the membrane in a crosshatch pattern with a sharp knife. This allows the meat to tenderize and absorb flavor without completely compromising structural integrity, ensuring maximum juiciness. If you prefer, gently pry it off with a paper towel for a truly seamless bite.
- The Dry Rub: Before any cooking begins, a flavorful dry rub is essential. A brown sugar-based rub, often with smoky paprika, garlic powder, onion powder, and a touch of cayenne, creates a fantastic flavor base and helps build that desirable crust. Pat the rub generously onto both sides of the ribs, ensuring a good coating.
The Baking Process: Set It and Forget It
Once prepped, the oven method shines for its simplicity and reliability.
- Cutting for Success: While whole racks look impressive, cutting the ribs into smaller sections (e.g., 2-3 bone portions) before baking can help the flavor penetrate more deeply and allows for easier handling later. However, cooking a whole rack is also perfectly viable; just ensure even coverage with foil.
- Tight Seal, Tender Results: Place your rubbed ribs on a large baking sheet. Crucially, cover them *tightly* with aluminum foil. This creates a steamy environment, locking in moisture and ensuring the meat gently braises and becomes incredibly tender without drying out.
- Low and Slow, Indeed: Bake the ribs at a consistent, low temperature, typically around 300°F (150°C), for approximately 2.5 to 3 hours. The exact time will depend on the thickness of your ribs, but you're looking for the meat to be fork-tender and visibly pulling away from the bone. This long, gentle bake is where the magic of "set it and forget it" truly comes into play, making it a fantastic, no-babysitting-required recipe.
For more on achieving this perfection, delve into our guide on
Sweet & Smoky Sticky Ribs: Fall-Apart Tender With a Bourbon Kick.
The Grand Finale: Achieving That Irresistible Sticky Glaze (Baked & BBQ Finish)
Once your ribs are fall-apart tender, the next step is to transform them with that signature sticky glaze. This is where the choice between oven and grill comes into play for the finishing touches.
Crafting Your Signature Glaze
While the ribs are slow-cooking, prepare your glaze. This sauce is the star that provides the "sticky" and "glazed" in "baked or barbecued sticky glazed ribs."
- Flavor Harmony: Combine ingredients like brown sugar, honey or maple syrup, soy sauce, rice vinegar, garlic, ginger, a touch of sriracha for heat, and perhaps a splash of bourbon or apple cider vinegar for depth.
- Simmer to Thicken: Bring the sauce ingredients to a low boil in a small saucepan, then reduce to a simmer for 5-10 minutes. This allows the flavors to meld and the sauce to thicken slightly. Let it cool; it will continue to thicken as it rests.
Oven Finish: Broiler for Caramelization
If you're sticking with the oven for the entire process, the broiler is your secret weapon for the glaze.
- Uncover and Brush: Once the ribs are tender, carefully remove the foil and turn on your oven's broiler to high.
- Broil for Perfection: Liberally brush the ribs with your prepared glaze. Place them under the broiler for 1-2 minutes, watching *very closely* to prevent burning. The sugar in the glaze will caramelize quickly, creating a beautiful, sticky crust. Remove, brush with more sauce, and repeat one or two more times until you achieve the desired stickiness and color. This quick blast of intense heat seals in flavor and gives the ribs an irresistible sheen.
BBQ Grill Finish: Smokey Char and Outdoor Flavor
For those who adore the classic char and smoky essence of a grill, finishing your pre-baked ribs outdoors is an excellent option.
- Pre-Baked Advantage: The beauty of this method is that the ribs are already perfectly tender from their oven bath. The grill phase is purely about flavor and caramelization, eliminating the risk of drying them out.
- Grill Setup: Preheat your barbecue grill to a medium-low heat. You want enough heat to caramelize the sauce, but not so much that it burns before it sticks.
- Glaze and Grill: Brush the tender ribs generously with the sticky sauce. Place them on the grill grates. Grill for about 10-15 minutes total, turning frequently and brushing with more glaze every few minutes. Keep an eye out for flare-ups from the sugary sauce. The heat of the grill will reduce the sauce further, creating an incredible sticky, slightly charred crust with that unmistakable smoky flavor. This hybrid approach delivers the best of both worlds!
Baked vs. BBQ: Which Method Reigns Supreme?
The ultimate decision between completely baked or primarily baked with a BBQ finish truly depends on your preference, equipment, and desired flavor profile.
The Case for Baked Ribs
- Consistency & Ease: Baking offers unparalleled consistency. The controlled environment of the oven ensures even cooking and reduces the risk of burning, making it a fantastic "no-fail" option for beginners and seasoned cooks alike.
- Weather Independent: Rain or shine, you can make perfect ribs. No need to worry about the elements.
- Less Supervision: The low-and-slow baking phase is largely hands-off, freeing you up to prepare sides or simply relax.
The Case for BBQ-Finished Ribs
- Authentic Smoke Flavor: There's no denying the distinct, deep smoky flavor that only a grill can impart. If you crave that traditional BBQ essence, a grill finish is a must.
- Superior Char & Texture: The direct heat of a grill creates fantastic char marks and a slightly crispy exterior that many find irresistible, adding another layer of texture to the sticky glaze.
- Outdoor Experience: For many, grilling is more than just cooking; it's an event, perfect for summer gatherings and tailgating parties.
The Hybrid Approach: The Best of Both Worlds
For many rib connoisseurs, the hybrid method—baking the ribs low and slow in the oven for tenderness, then finishing them on the grill for that smoky, caramelized char—is the undisputed champion. It combines the guarantee of ultimate tenderness with the complex flavors and textures only a grill can provide, making for truly superior
no-fail sticky ribs.
Serving Suggestions & Versatility
These sticky glazed ribs are incredibly versatile. While they make a show-stopping main course for family dinners, don't limit yourself! Cut into individual portions, they become fantastic appetizers for any get-together, tailgating party, or potluck. They're excellent served straight out of the oven or off the grill, but they also hold up beautifully kept warm in a crockpot, or even served at room temperature, making them a perfect make-ahead dish. Pair them with classic BBQ sides like coleslaw, corn on the cob, or a crisp green salad to complete the meal.
Ultimately, whether you lean towards fully baked or utilize your grill for that final flourish, mastering the art of sticky glazed ribs is a culinary achievement worth celebrating. The journey from raw slab to fall-off-the-bone deliciousness is an incredibly rewarding one, promising ultimate tenderness and a craveable glaze that will have everyone reaching for more. So go ahead, choose your adventure, and enjoy the sweet, smoky, and utterly irresistible results of your homemade
sweet & smoky sticky ribs.